PROGRESS UPDATE – WEEK 9

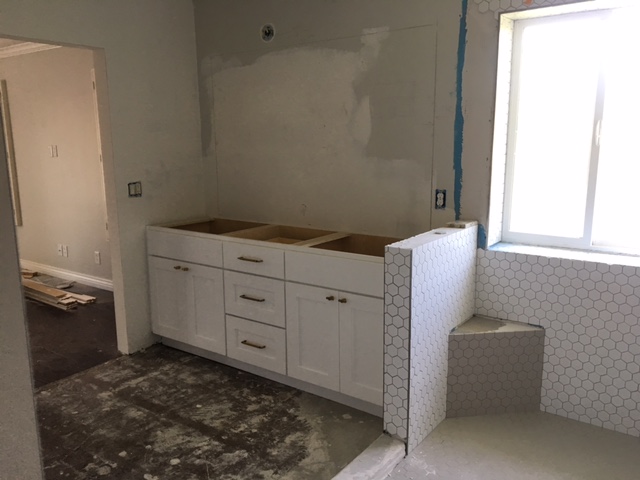
When we told our contractor that we could take our time getting the house remodeled I think we were under the impression that it could take 2 months… but we are going on three and likely almost four before we are going to be done and ready to move in. Each time we go to the house to look at progress or just to enjoy the pool in the backyard and let the doggies run around we get more and more antsy to get there permanently. As for the most recent progress, cabinets are in (living room cabs need to be modified – they don’t match my design height) and the countertops get installed this Thursday. Once those countertops are in, everything else can begin (floor tile, wall tile, trim, electrical work, final plumbing, etc etc.). So yay…. can’t wait until Thursday!!!

Our new hall bath looks so good but is so small that we made a last minute decision to make the door a barn door style so we don’t have to pinch the space any more with a swing style. Yep, I had to go buy another door and sell the new 24″ prehung door on craigslist yesterday but overall I think its a great decision. Oh, and look how nice the new skylights are in the kitchen and greatroom areas.

IMG_5492IMG_5496IMG_5497IMG_5498IMG_5499IMG_5502IMG_5503

PROGRESS UPDATE – WEEK 6

Gosh, it feels like we have stalled a bit but my contractor has been busy at the house about 2 days a week. He has another big project so we kind of get him when he has breaks between other scheduled activities on that home expansion. Anyhow, we have the skylight guy (I contracted him directly) installing our two Velux skylights and at the same time opening the heck out of our kitchen ceiling above the island. We couldn’t raise the ceiling because of all of the ducting, pipes, and funky past remodel framing – but this new operable skylight that is replacing the low hanging hood above the range top on the old island is allowing us to have an opening that is probably around 5 or 6 feet wide by just under four feet. It’s going to really help our kitchen feel so much more airy. I’ve attached two photos – the kitchen (above island) area and the one we had installed in the living room to kick more light into the dark interior. Mike had to move two speakers to get the symmetry right in the living room but these are going to look awesome after they get drywalled tomorrow. Yipee!

Progress Update – Week 4

I think I’ve been off one week since we closed on the house Feb 3rd (so just over one month ago). The bathrooms are coming along despite the tile in the niches having to be removed since it didn’t follow my design. I’m also a bit bummed they forgot to install the little step/seat in the corner of the shower but I’ll survive. The closet has been drywalled and the ceiling in the master bath has a million patches in it since an exhaust fan and an HVAC vent were removed to align with the new design. I’ll be traveling all week so I’m super excited to see the progress when I get home on Friday. I’m glad Mike will be here as the stand-in PM to make sure it all goes as planned. The next thing I’m REALLY exited to see are the new skylights being installed on the 13th – one week from tomorrow!

Progress Update – Week 4 Construction

I’m posting just a couple snapshots of the bathrooms today. We are so happy to be moving right along! I’m traveling tomorrow so Mike will be the task master and let them know that I want to change the niche in the master shower to have the floor plank tile inside (as I originally requested). Other than that I’m super happy with how it is turning out!

PROGRESS UPDATE – WEEK 3 BATHROOMS

I love seeing things come together! And I love my super neutral color palate for this house. One thing that makes me crazy is seeing a different set of finishes in each bathroom and this house had it – and they were three different styles! The kitchen will have the same finishes as well – Just a little bit different by possibly changing up the color of the hex tile in the kitchen backslash. Below is a photo of the hall bathroom’s new tub and the new master bathroom’s walk in shower where the old triangular tub surround was.

PROGRESS – WEEK 3 CONSTRUCTION

Well it’s pretty nice to say that we are finally “in construction” instead of just demo! I met with the tile installer yesterday about my design (he didn’t love my accent scheme for the shower but hey, it’s my house and I’m the architect so I overrule!)  Today the plumber has been on site all day and they removed the old chipped cast iron tub and are in the process of adding all of the valves, rerouting lines (including the old garden tub drain line so it will drain towards the middle of the new shower). I’m happy that finally I’m getting a shower with a control right inside the door so I don’t have to try to avoid stepping into frigid water anymore. Once the plumbing is complete the tile guys can start on the shower in the master bath and hall bath. The contractor won’t be over again until Friday so the next post I have will likely be this weekend. It’s so nice to see progress!

PROGRESS UPDATE – WEEK 2 DEMOLITION

Nothing made me smile more than seeing the tub, shower, and closet interior removed so we could really design the proper layout of the master bathroom and closet. I’m including a photo of the shower that I didn’t include earlier. It looks nice but know that it was built very shoddily and the grout lines were cracked, the ceiling light was not wet room rated AND it was off center (how dare they!) but we are planning to reuse the glass door with new hardware.

I’m including a couple “before” photos below so you can see exactly what the room looked like before demo. Btw, an enclosed toilet room to me is so icky… we are going to remove the door and raise the ceiling. Don’t worry, it still is in a little nook that is way out of sight and will not reflect in the mirror that will be over the vanity.

PROGRESS UPDATE – WEEK 1 DEMOLITION

I do love me some demo! As long as I don’t have to do it myself these days (we have majorly proven that we can do all forms of construction ourselves but have wisely graduated to hiring the pros). Below are photos of the kitchen without the island – wow it sure opens up the space! And the two solar vented 2×4 Velux skylights are going to be sweet above a nice rectangular island with my glass and brass pendant globes. Our current house has 9 and 10 foot ceilings and we wanted to raise the ceiling in this new home but the framing really (quite literally) won’t support that  so we have to be creative with skylight placement to make it feel more open and less dark. Oh, and that wall that has new drywall? Yeah, the previous remodeler didn’t care that the framing was true. It was a furred out existing block wall that was the back wall of the original house. The lazy person who framed it made it look like it was leaning – it was off by 2.5″ at the top and looked like a serious defect in the structure. I’m so glad we took a chance… I was holding my breath as we pulled off the old drywall to see what potentially scary situation was waiting for me. Whew! So glad it was all OK and my contractor made the cosmetic fixes to look perfect!

PROGRESS UPDATE – DESIGN INTENT

Because this is my own house and not a client’s I can get away with some very loose sketches – especially since I needed a cost estimate first. And we needed to do some demo to find out was was possible without causing a ton of costly changes (specifically plumbing and electrical). One of our first dilemmas was to keep a bathtub in the master bathroom – or to remove it altogether since we have another full bathroom with a tub. We aren’t bath takers but apparently we are risk takers and decided to eliminate the tub in the master bath, turn it into a nice big walk-in shower and repurpose the existing shower nook to become one long walk-in closet. The existing bathroom is such a silly design with very little circulation space so I’m sure we are going to really love all the new space my design will create. The new, much longer vanity will also be a great change for this room. Below are my original sketches and my quickie CAD plan of the closet design so my contractor can start framing it out tomorrow. We did a bit of demo last week so now we know this layout will work.

SELECTING THE INTERIOR FINISHES

I’ll cover the general design in the next posting – this posting is about the “stuff” that is the most fun for me. Generally my professional work surrounds large commercial buildings so I get so excited about all the pretty details when I have a residential project to play with. Our MCM furnishings are pretty funky with loads of bright teal, turquoise, and generous pops of orange. I fell in love with that crazy turquoise color when we expanded our first home in SoCal: Apartment Therapy – Mid Century Home

Many of our original vintage pieces have brass details that I love to compliment with other brushed brass elements (we are so lucky that they are abundant right now since brass has had a bit of a faddish comeback). I introduced some brass elements in the light fixture selection of our last house here: Austin Home Magazine – Past Made Perfect

Rather than doing modern slab cabinets in the kitchen as we have done in the past (we are refacing the existing Kraftmaid cabinets that are in otherwise perfect condition) we decided to go with a “modern shaker” route. I know, sounds like a contradiction but I know they will be great and if we don’t stay in this home forever and ever they will most likely make someone else very happy. Note: we do plan to live here for a LONG time! I toyed with doing a contrasting island color but don’t want to follow every kitchen trend that I’m loving right now but might not like in a year or two. Attached is my design inspiration board mostly peppered with images that I found on Pinterest along with images directly from the websites I purchased the light fixtures from. Oh, and my new Velux skylights are going to be fabulous for bringing in much needed light into the fairly dark kitchen/dining area.